Introduction to Home Recording for Songwriters
The music industry has undergone a revolutionary transformation in recent years, with the rise of DIY music production reshaping how songwriters create and record their music. According to a 2024 report, more artists than ever can now produce chart-topping hits from the comfort of their own bedrooms. This shift has been driven by technological advancements that have made home recording not only convenient but also increasingly affordable for songwriters.

The Growing Trend of DIY Music Production
The global music recording market size is estimated to be $55.5 billion in 2024, with projections showing a compound annual growth rate (CAGR) of 6.6% from 2024 to 2031.
This growth is partly fueled by the increasing accessibility of home recording technology. In fact, the U.S. recorded music industry revenue increased by 22.9% from $12.2 billion in 2020 to $15 billion in 2021, indicating a robust market for music production, including DIY efforts.
The number of Americans with paid streaming subscriptions has skyrocketed from 7.9 million in 2014 to 82.2 million in 2022, demonstrating the growing appetite for music consumption. This trend presents a unique opportunity for songwriters to reach a wider audience through self-produced recordings.
Benefits of Home Recording for Songwriters
Home studios offer numerous advantages for songwriters:
- Creative Control: Having a home setup gives songwriters complete creative control and flexibility
- Affordability: Home recording allows for experimentation with musical ideas without the high costs of professional studio time
- Convenience: Record whenever inspiration strikes, without scheduling constraints.
- Learning Opportunity: Develop production skills alongside songwriting abilities.
- Iterative Process: Easily revisit and refine songs over time.
- Portfolio Building: Create high-quality demos for pitching to industry professionals.
Essential Equipment for Your First Home Studio
To set up your home recording studio, you’ll need some key components. While the specific gear may vary based on your needs and budget, here are the essentials:
Computer and DAW Software
A reliable computer is the heart of your home studio. It doesn’t need to be top-of-the-line, but it should be capable of running your chosen Digital Audio Workstation (DAW) smoothly. When choosing a computer, consider the following factors:
Processor (CPU): Aim for a multi-core processor. Intel i5/i7 or AMD Ryzen 5/7 are good starting points.
RAM: 8GB is the minimum, but 16GB or more is recommended for smoother performance.
Storage: Solid State Drives (SSDs) offer faster load times and better performance than traditional hard drives.
Popular DAW options for beginners include:
- GarageBand (free for Mac users)
- Audacity (free, open-source)
- Reaper (low-cost)
- FL Studio
- Ableton Live
- Logic Pro (for Mac users)
Each DAW has its strengths, so research and try out demos to find the one that suits your workflow best.
Audio Interface
An audio interface acts as the bridge between your instruments/microphones and your computer. It converts analog signals to digital and vice versa. Look for an interface with at least two inputs to allow for simultaneous recording of vocals and an instrument.
Key features to consider:
- Preamp quality
- Number of inputs/outputs
- Sample rate and bit depth
- Latency performance
- Connectivity (USB, Thunderbolt, etc.)
Popular entry-level interfaces include the Focusrite Scarlett series, PreSonus AudioBox USB, and Behringer U-Phoria series.
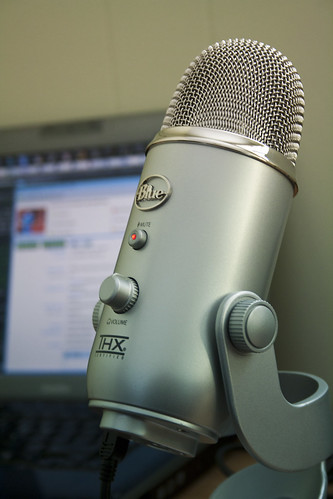
Microphones
For songwriters, a good condenser microphone is often recommended for recording vocals. Consider starting with a large-diaphragm condenser microphone, which is versatile enough for vocals and acoustic instruments.
Check out our in-depth list of the best USB mics for songwriters (click here).
Types of microphones to consider:
- Large-diaphragm condenser: Great for vocals and acoustic instruments (e.g., Audio-Technica AT2020, AKG P220)
- Small-diaphragm condenser: Ideal for acoustic instruments and overheads (e.g., Rode M5 Matched Pair)
- Dynamic microphones: Versatile and durable, good for loud sources (e.g., Shure SM58, Sennheiser e835)
As you expand your studio, consider adding different microphone types to cover various recording scenarios.
Headphones and Studio Monitors
A pair of closed-back headphones is essential for recording and mixing. They provide isolation and allow you to hear details in your recordings. Some popular options include:
- Sony MDR-7506
- Beyerdynamic DT 770 Pro
- Audio-Technica ATH-M50x
As you progress, consider adding studio monitors for more accurate mixing and mastering. Entry-level options include:
- JBL 305P MkII
- KRK Rokit 5 G4
- Yamaha HS5
When setting up monitors, proper placement is crucial. Position them in an equilateral triangle with your listening position, and ensure they’re at ear level.
Accessories
Don’t forget about these essential accessories:
- Cables: XLR cables for microphones, instrument cables, and any necessary adapters
- Mic stands: A sturdy stand for your microphone(s)
- Pop filter: Reduces plosives in vocal recordings
- Headphone amplifier: If recording multiple musicians simultaneously
- DI box: For recording electric instruments directly
- Acoustic treatment: Basic foam panels or DIY solutions to improve room acoustics
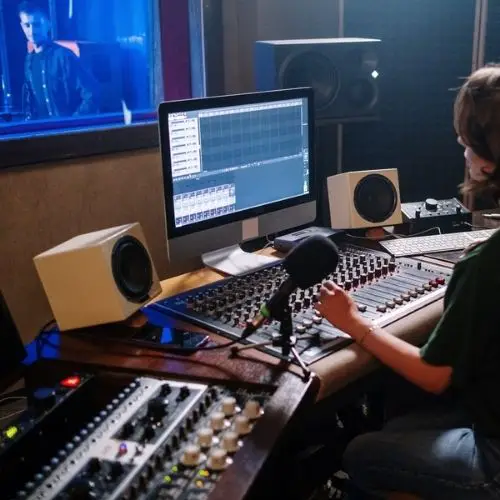
Setting Up Your Home Recording Space
Creating an effective recording environment is crucial for achieving professional-sounding results.
Choosing the Right Room
Select a quiet room with minimal external noise. Consider the following factors:
- Room size: A medium-sized room (12×12 to 20×20 feet) often works well.
- Ceiling height: Higher ceilings can provide a more natural sound.
- Shape: Avoid perfect squares or rectangles, as they can create standing waves.
- Windows: Fewer windows mean less outside noise.
- Flooring: Carpeted rooms can help reduce reflections.
Basic Acoustic Treatment
While professional acoustic treatment can be expensive, there are budget-friendly options:
- Use heavy curtains or blankets to absorb sound reflections.
- Place bookshelves or other irregular surfaces to diffuse sound.
- Consider acoustic panels for critical areas like the first reflection points.
- Bass traps in corners can help control low-frequency buildup.
- DIY options: Create your own acoustic panels using rock wool insulation and fabric.
Remember, the goal is to create a balanced acoustic environment, not a completely dead space.
Ergonomics and Organization
Set up your workspace for comfort and efficiency:
- Invest in a comfortable, adjustable chair to maintain good posture during long sessions.
- Position your computer monitor(s) at eye level to reduce neck strain.
- Use a MIDI keyboard controller as a central hub for your setup.
- Organize your equipment in a way that allows for easy access and minimal cable clutter.
- Consider a standing desk or adjustable workstation for variety in your working position.
- Ensure proper lighting to reduce eye strain and create the right ambiance for creativity.
Getting to Grips with Recording Software
Learning to use a DAW effectively is crucial for home recording (https://www.adorama.com/alc/how-to-record-a-song/). Here are some tips to get started:
Choosing the Right DAW
Consider factors like your budget, operating system, and specific needs when selecting a DAW. Many offer free trials, so experiment with a few before committing. Key factors to consider:
- User interface and workflow
- Available plugins and virtual instruments
- MIDI capabilities
- Mixing and mastering tools
- Compatibility with your hardware
- Community support and learning resources
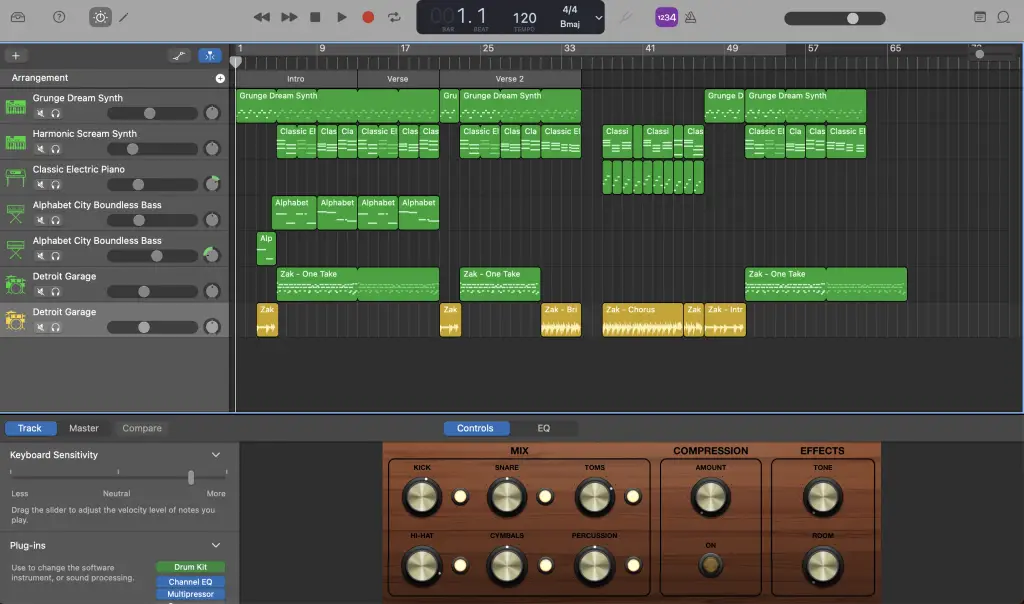
Understanding Basic DAW Functions
Familiarize yourself with key DAW features:
- Track creation and management
- Audio tracks
- MIDI tracks
- Auxiliary tracks (Aux tracks)
- Groups and busses
Recording and editing audio
- Setting up inputs and outputs
- Arming tracks for recording
- Punch-in/punch-out recording
- Comping takes
- Basic audio editing (cutting, fading, crossfading)
Using virtual instruments and MIDI
- Loading and playing virtual instruments
- Recording MIDI performances
- MIDI editing and quantization
- Working with MIDI controllers
Mixing tools
- EQ: Shaping the frequency content of your tracks
- Compression: Controlling dynamics
- Effects: Adding depth and interest to your mix
- Automation: Creating movement and interest with panning, volume, and other automations
Exporting your finished projects
- Rendering/bouncing tracks
- Choosing appropriate file formats and quality settings
- Preparing for distribution or further mastering
Resources for Learning Your DAW
Take advantage of these resources to master your chosen DAW:
- Official documentation and tutorials from the DAW developer
- YouTube channels dedicated to music production and specific DAWs
- Online courses on platforms like Coursera, Udemy, or LinkedIn Learning
- Books and e-books focused on your DAW
- Community forums and user groups
- Local workshops or classes at music stores or community centers
Recording Techniques for Songwriters
Capturing high-quality recordings is essential for bringing your songs to life.
Microphone Placement and Technique
Proper microphone placement is crucial for capturing clear, balanced recordings. Here are some general guidelines:
Vocals:
- Start with the microphone 6-8 inches from the singer’s mouth
- Adjust based on the singer’s volume and the microphone’s characteristics
- Use a pop filter to reduce plosives
Acoustic Guitar:
- For a balanced sound, aim the microphone at the point where the neck meets the body
- Experiment with a second microphone near the bridge for more string detail
Electric Guitar Amp:
- Place the microphone close to the speaker cone for a direct sound
- Move it slightly off-center to reduce harshness
- Experiment with room mics for added ambience
Drums:
- Start with a basic four-microphone setup: kick, snare, and two overheads
- Adjust overhead placement to capture a balanced image of the entire kit
Remember, these are starting points. Always trust your ears and experiment to find the best sound for your songs.
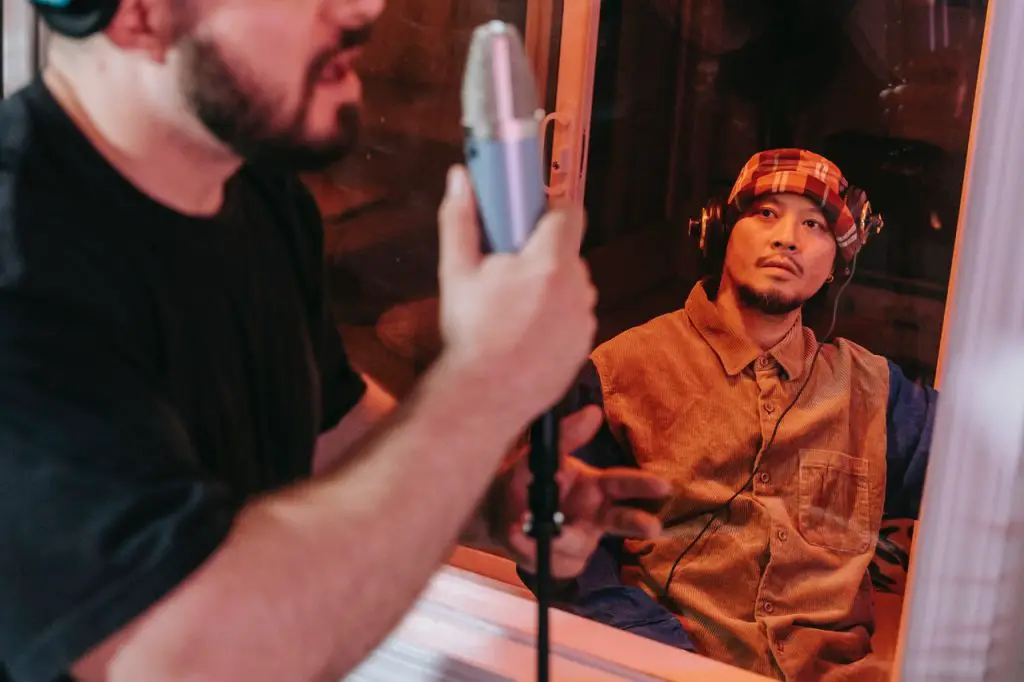
Recording Vocals
Vocal recording is often the centerpiece of a song. Here are some tips for capturing great vocal performances:
Prepare the space:
- Use acoustic treatments or makeshift options (like hanging blankets) to improve room acoustics
- Ensure the singer has good sight lines to lyrics or a music stand
Microphone technique:
- Maintain a consistent distance from the microphone
- Use a pop filter to reduce plosives
- Experiment with off-axis singing for different tonal qualities
Performance tips:
- Do proper vocal warm-ups before recording
- Stay hydrated throughout the session
- Take breaks to avoid vocal fatigue
- Consider recording multiple takes and comping the best parts
Emotional delivery:
- Focus on conveying the emotion of the song – even (especially!) when recording at home
- Consider the context and story behind the lyrics
- Experiment with different vocal techniques to add character to the performance
Recording Acoustic Instruments
Acoustic instruments require careful attention to capture their natural sound:
Acoustic Guitar:
- Experiment with microphone placement to capture the right balance of body and string sound
- Try a combination of a small-diaphragm condenser near the 12th fret and a large-diaphragm condenser for room ambience
- Be aware of fret noise and adjust mic placement accordingly
Piano:
- For a stereo recording, place one mic near the high strings and another near the low strings
- Experiment with mic placement inside the piano (for grands) or near the soundboard (for uprights)
- Consider the room acoustics and use room mics for added depth
Strings (Violin, Cello, etc.):
- Place the microphone slightly above and in front of the instrument
- Adjust distance to balance direct sound and room ambience
- Be mindful of bow noise and adjust accordingly
Woodwinds and Brass:
- Position the microphone slightly off-axis to avoid direct air blasts
- Experiment with distance to capture a balance of direct sound and room tone
- Use a pop filter or windscreen to reduce air noise
Remember, the key to great acoustic recordings is finding the sweet spot where the instrument sounds most natural and balanced.
Basic Mixing Techniques for a Polished Sound
Mixing is where your recorded tracks come together to form a cohesive song. Here’s a deeper dive into essential mixing techniques:
Balancing Levels
Start by setting appropriate volume levels for each track:
- Begin with the most important elements (usually vocals and drums)
- Gradually bring in other instruments, balancing them against the core elements
- Use volume automation to address any inconsistencies within individual tracks
- Consider using pink noise as a reference for setting initial levels
- Take frequent breaks to avoid ear fatigue and maintain perspective
EQ and Frequency Balance
Use EQ to carve out space for each instrument in the frequency spectrum:
- Start with subtractive EQ, cutting problematic frequencies
- Use high-pass filters to remove unnecessary low-end rumble
- Boost sparingly, and only after cutting
- Consider the full mix when EQing – solo’ing can be misleading
- Use spectrum analyzers to identify frequency buildups or deficiencies
- Remember that instruments occupying similar frequency ranges will compete for space
Compression and Dynamics
Apply compression to control dynamic range and add consistency to your tracks:
- Start with a low ratio (2:1 or 3:1) and adjust as needed
- Set the threshold so that the compressor engages on the loudest parts
- Adjust attack and release times to suit the material – faster for transients, slower for sustained sounds
- Use makeup gain to compensate for level reduction
- Consider using parallel compression for a blend of dynamics and consistency
- Be careful not to over-compress, as this can lead to a lifeless mix (https://theselfrecordingband.com/top10mistakes/)
Panning and Stereo Image
Use panning to create width in your mix and separate instruments:
- Keep low-frequency elements (kick, bass) centered
- Pan rhythm guitars slightly left and right for width
- Use LCR (Left-Center-Right) panning for a classic sound
- Experiment with auto-panning for movement and interest
- Consider the stereo image of reverbs and delays
- Use a stereo imager plugin to enhance the width of certain elements
Adding Effects and Polish
Effects can enhance your recordings and add professional polish to your productions.
Reverb and Delay
Use reverb and delay to add depth and space to your mix:
Reverb:
- Choose reverb types that complement your song (room, hall, plate, etc.)
- Use pre-delay to separate the dry signal from the reverb
- Consider using different reverbs for different instruments
- Automate reverb sends for specific moments in the song
Delay:
- Sync delay times to the tempo of your song
- Use ping-pong delay for stereo width
- Experiment with tape delay emulations for added warmth
- Use delay throws on specific words or phrases for emphasis
Remember, less is often more with reverb and delay. Start subtle and increase as needed.
Chorus, Flanger, and Other Modulation Effects
Experiment with modulation effects to add movement and interest to your tracks:
Chorus:
- Great for thickening guitars, vocals, and synths
- Use sparingly to avoid muddiness
Flanger:
- Can add a swooshing, jet-like effect
- Effective on guitars and synths for psychedelic sounds
Phaser:
- Adds a sweeping, undulating effect
- Works well on electric pianos and guitars
Tremolo:
- Creates a pulsing effect in volume
- Effective for creating vintage-style guitar sounds
Rotary speaker effect:
- Emulates the sound of a Leslie speaker
- Great for adding movement to organs and electric pianos
When using modulation effects, consider automating their parameters to create evolving textures throughout your song.
Automation
Use automation to add movement and interest to your mix:
Volume automation:
- Highlight important parts of a performance
- Create fade-ins and fade-outs
- Balance levels throughout different sections of the song
Pan automation:
- Create stereo movement for increased interest
- Widen or narrow the stereo field at key moments
Effect parameter automation:
- Increase reverb at the end of phrases
- Adjust delay feedback for build-ups
- Modulate filter cutoffs for synth sweeps
Automate sends:
- Gradually increase effect sends for buildups
- Reduce sends in busy sections for clarity
Remember, subtle automation can often be more effective than dramatic changes. Use automation to enhance the emotional impact of your song.
Common Pitfalls and How to Avoid Them
Be aware of these common mistakes to improve your home recordings:
Poor Room Acoustics
Untreated rooms can negatively impact recordings. To mitigate these issues:
- Identify and treat first reflection points
- Use bass traps in corners to control low-frequency buildup
- Diffuse sound with bookshelves or purpose-built diffusers
- Consider using a reflection filter behind your microphone
- Record in the center of the room to avoid boundary effects
Lack of Planning and Organization
Poor organization can hinder productivity. To improve your workflow:
- Create templates for quick session setup
- Develop a consistent file naming and organization system
- Use color-coding in your DAW for easy track identification
- Keep a recording diary to document successful techniques
- Regularly backup your projects and sample libraries
Overlooking the Importance of Monitoring
Invest in good quality headphones or monitors, and learn their sound. This will help you make better mixing decisions and achieve more consistent results across different playback systems. Tips for better monitoring:
- Position monitors at ear level in an equilateral triangle with your listening position
- Use monitor isolation pads to decouple speakers from surfaces
- Learn your monitoring environment by listening to reference tracks
- Use multiple monitoring sources (headphones, monitors, car stereo) to check mixes
- Consider using room correction software to compensate for acoustic issues
Neglecting Gain Staging
Proper gain staging is crucial for achieving clean, professional-sounding recordings:
- Set appropriate input levels to avoid clipping
- Aim for peak levels around -10 to -6 dB when recording
- Maintain consistent levels throughout your mixing chain
- Use gain plugins to adjust levels between processing stages
- Be mindful of overall headroom, especially when summing multiple tracks
Collaborating Remotely with Other Musicians
In today’s interconnected world, remote collaboration has become increasingly common and important for songwriters.
Tools for Remote Collaboration
Utilize these tools to facilitate smooth remote collaborations:
Communication:
- Zoom or Skype for video calls and screen sharing
- Slack or Discord for text-based communication and file sharing
File sharing:
- Dropbox or Google Drive for large file transfers
- WeTransfer for one-time file sends
Real-time collaboration:
- Audiomovers for low-latency audio streaming
- JamKazam for real-time playing
Project management:
- Trello, Notion, or Asana for task tracking and project organization
- Google Docs or Google Sheets shared with other musicians, producers
Specialized platforms:
- Soundtrap for collaborative songwriting and production
- BandLab for online DAW collaboration
- Splice for sharing and collaborating on projects
Best Practices for Successful Remote Projects
Clear communication and setting expectations are key for successful remote collaborations. Follow these best practices:
- Establish clear roles and responsibilities for each collaborator
- Set realistic deadlines and milestones
- Agree on file formats, sample rates, and naming conventions
- Use version control to track changes and avoid confusion
- Schedule regular check-ins to discuss progress and address issues
- Be open to feedback and willing to compromise
- Test your remote setup before important sessions
- Have a backup plan for technical difficulties
Continuing Education and Resources
The world of home recording is constantly evolving. Stay up-to-date with these resources:
Online Courses and Tutorials
- Coursera: Offers courses from top universities on music production and sound engineering
- Udemy: Wide range of affordable courses on specific DAWs and production techniques
- LinkedIn Learning: In-depth, professional tutorials for the major DAWs as well songwriting and production techniques
- YouTube channels:
- Produce Like a Pro
- Recording Revolution
- Pensado’s Place
- Mix With The Masters
Books and Magazines
Invest in these resources for in-depth knowledge and to gain insights on “the industry”:
Books:
- “Mixing Secrets for the Small Studio” by Mike Senior
- “The Recording Engineer’s Handbook” by Bobby Owsinski
- “Zen and the Art of Mixing” by Mixerman
Magazines:
- Sound on Sound
- Mix Magazine
- Electronic Musician
- Future Music
Community Forums and Networking
Join online communities and forums to connect with other home recording enthusiasts:
- Gearslutz (now Gearspace): Large community discussing all aspects of audio production
- Reddit communities: r/audioengineering, r/WeAreTheMusicMakers, r/mixingmastering
- KVR Audio forums: Great for discussions on plugins and virtual instruments
- Local meetups and user groups for musicians, producers, songwriters. (Consider starting your own meetup!)
Attend Virtual Conferences and Workshops
Participate in online events to learn from industry professionals:
- NAMM Show (National Association of Music Merchants)
- AES Conventions (Audio Engineering Society)
- Ableton Loop (for electronic music producers)
- Meetups organized by local studios or music stores
Home Recording For Songwriters – Stay Curious
Setting up a home recording studio as a songwriter opens up a world of creative possibilities. With the global music recording market projected to grow, there’s never been a better time to dive into home recording.
Remember, the most important tool in your studio is your creativity. Don’t let technical limitations hold you back – some of the most iconic songs in history were recorded with far less sophisticated equipment than what’s available to home recordists today.
As you embark on your home recording journey, keep these key points in mind:
Start with the essentials and upgrade gradually as you identify your needs
Great gear won’t automatically make you a music producer. Learn how to use the gear you have access to right now in a great way.
Focus on developing your skills rather than acquiring gear
Skills trump gear, every time. Learning to work with the limitations of your gear will make you a more skilled producer with a strong understanding of the fundamentals.
Learn your room and your equipment inside out
The limits and parameters of the space and gear you use will give your work a certain quality. Learn these limits to then creatively transform them as needed.
Experiment with different techniques and don’t be afraid to break the rules
Innovation comes from doing the same things in a different way. Creative ideas often sprout from tweaking tried-and-true ways of doing things.
Collaborate with others to expand your skills and network
Connecting with others gives you access to different perspectives, connections to opportunities, and makes the process of making music more enjoyable. Sharing is caring. ????
Stay curious and never stop learning
Remember why you became interested to music in the first place. Keep expanding the limits of your understanding and ability by nurturing a sense of curiosity. Help others along the way and you may be surprised at the rewards and fulfillment it brings.
By following this guide and continually honing your skills, you’ll be well on your way to creating professional-quality recordings from the comfort of your own home. Remember that every great song starts with a single idea, and now you have the tools to bring those ideas to life.
Happy recording, and may your home studio be the birthplace of your next great song!